Hit the Ground Running
You've onboarded. This guide helps you to implement use cases.
Pre-Requisites
1. Create Logic Containers
Not sure what to do? Use the default logic containers (development and production) and skip to the next step
The very first thing to do is creating Logic Containers. These are ways you can split your environment.
How can Logic Containers be leveraged?
This clip shows the two logic containers created by default: Development and Production. It goes into the resource and pipeline tracker, where it:
- Filters pipelines to show only the ones with access to the displayed service connections.
- Associates service connection with their respective logic container (depending on their use case).
- Filters service connections based on logic containers.
Leverage Logic Containers
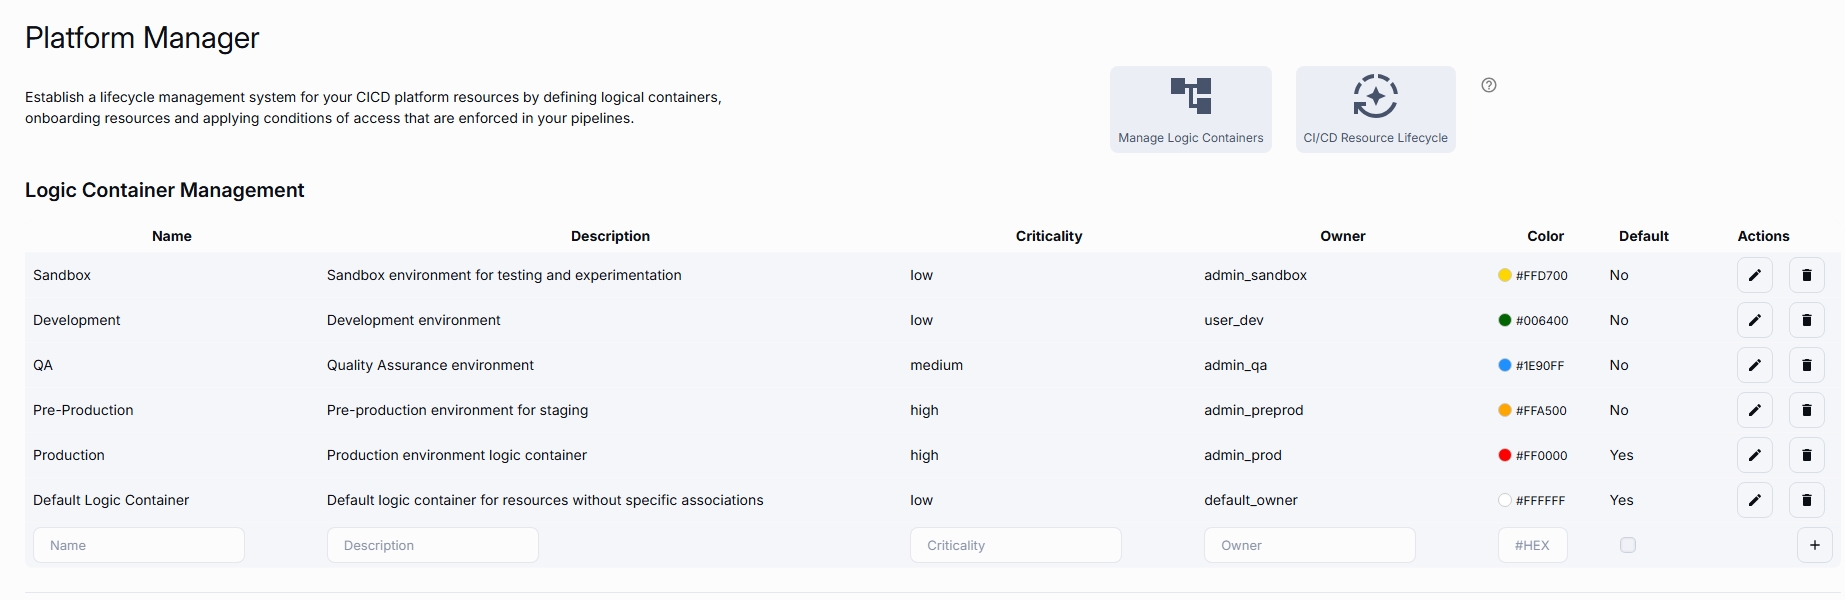
Logic Container Management
How you should split your environment depends on the level of granularity that suits. From the most basic split between Production and Non-Production, all the way to having Environment x Purpose x Team. A few options are presented below, and you can choose the approach to take in the Platform Management menu.
You can also mix and match.
- Simple split. Example:
devprod- Good for small teams or early stage
- Split by environment and function. Example:
dev-appdev-infraprod-appprod-infra
- More granular, supports separation of concerns
- Split by environment, function, and team. Example:
dev-app-teamAdev-infra-teamAprod-app-teamAprod-infra-teamA... team B's- Maximum isolation and control
2. Assign Logic Containers to CI/CD Resources
Use the Platform Management view to allocate each discovered CI/CD Resource to one of the Logic Containers defined in step 1.
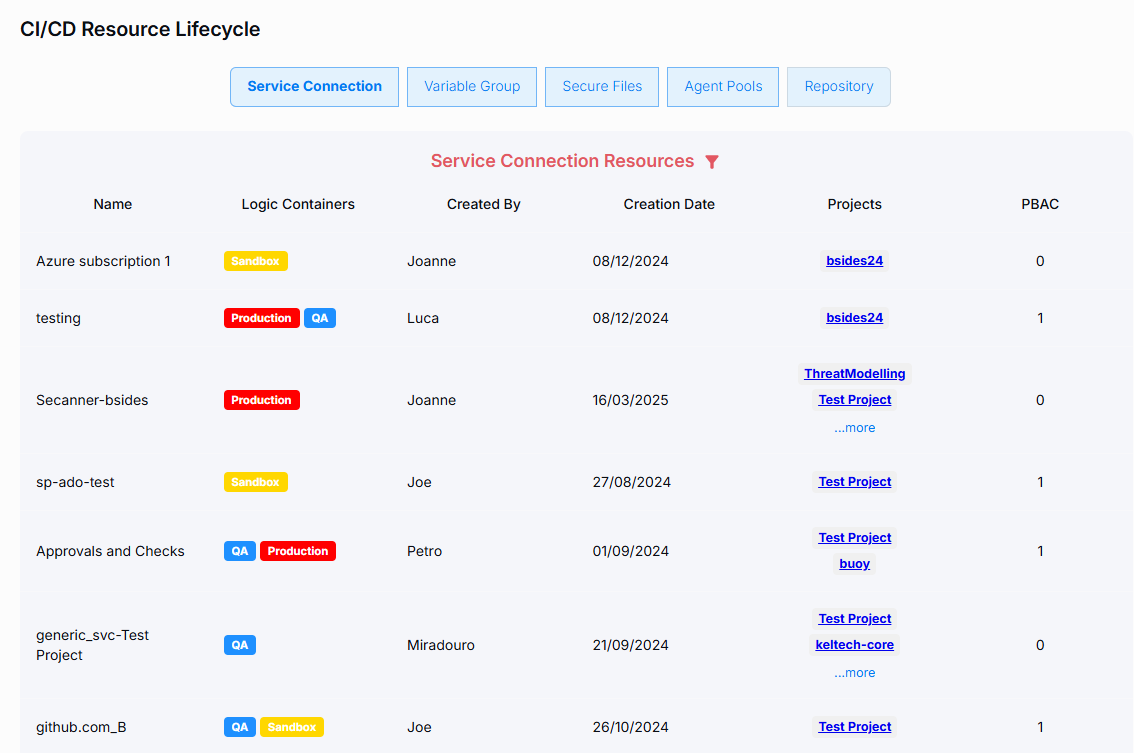
Allocate resources to logic containers
Note: Allocating the right logic container and continuous resource access level evaluation is a manual process today. Stay tuned for automatic allocation and evaluation.
Actions
The following guides you through some of the typical use cases of using Observes.
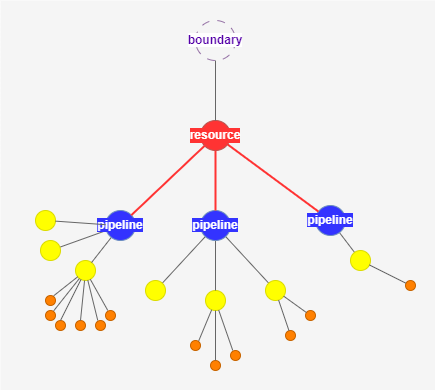
Overprivileged Pipelines
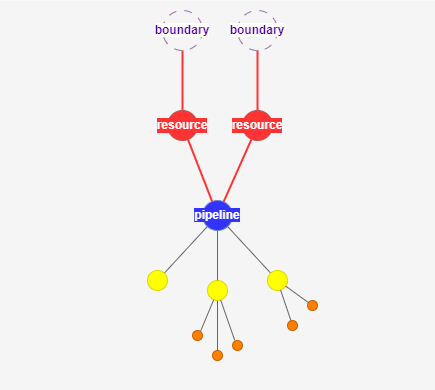
Visualisation of Overprivileged Pipelines
Detection
- Use the Resource Tracker to visualize pipeline permissions to CI/CD Resources (service connections, variable groups, secure files, pools and repositories).
- Use the pipeline filters to look for:
- Overprivileged Pipelines - This highlights cases where a single pipeline has access to multiple resources and these resources have access to multiple logic containers.
- Cross-Project Pipelines - Pipelines that break the project boundary (pipelines accessing resources in other projects).
Remediation
- Review the pipeline's access permissions in the Resource Tracker.
- What good looks like:
- A pipeline can only ever influence a single target logic container.
- OR (at least) the resources that the pipeline is allowed access to are protected by access conditions.
- Remove unnecessary permissions.
Overprivileged Resources
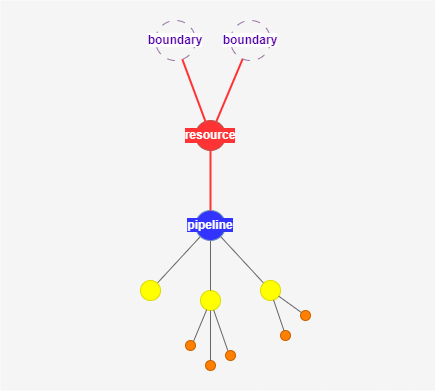
Visualisation of Overprivileged Resources
Detection
- Use the Resource Tracker to visualize CI/CD Resources (service connections, variable groups, secure files, pools and repositories).
- Use the resource filters to look for:
- Overprivileged Resources - This highlights cases where a single resource has access to multiple logic containers.
- Cross-Project Resources - This highlights cases where a resource breaks the project boundary (resource that exists in more than one project).
Remediation
- Review the resource's access metadata in the Resource Tracker. Confirm the logic containers assigned to it are relevant.
- What good looks like:
- A single resource can only ever affect one logic container.
- OR (at least) the resource is protected by access conditions.
- If the resource is overprivileged, consider creating credentials that segregate the access to multiple logic containers
Overshared Resources
Visualisation of Overshared Resources
Detection
- Use the Resource Tracker to visualize CI/CD Resources (service connections, variable groups, secure files, pools and repositories).
- Use the resource filters to look for:
- Overshared Resources - This highlights cases where a resource can be accessed openly by all pipelines
- Cross-Project Resources - This highlights cases where a resource breaks the project boundary (resource that exists in more than one project).
Remediation
- Review the need to have the resources in multiple projects and openly accessible by pipelines.
- What good looks like:
- Open access should be granted sparingly.
- Resources accessed across projects should be intentionally shared and permissions on each of the projects should watched for (one user's action in one project may affect multiple user's).
Pipeline Quality Gates Attestation
Check the Pipeline Tracker for pipelines that do not meet the defined policies (e.g., missing required steps or jobs).
Query pipelines with Checkmarx that use overshared resources
What to Do:
- Update pipeline-based policies to include necessary steps, jobs, or templates.
- Enforce policies by requiring pipelines to adhere to specific configurations.
Project Stats & User Management Dashboard
Observes provides a comprehensive dashboard for project statistics and user management, enabling teams to gain actionable insights and manage contributors effectively.
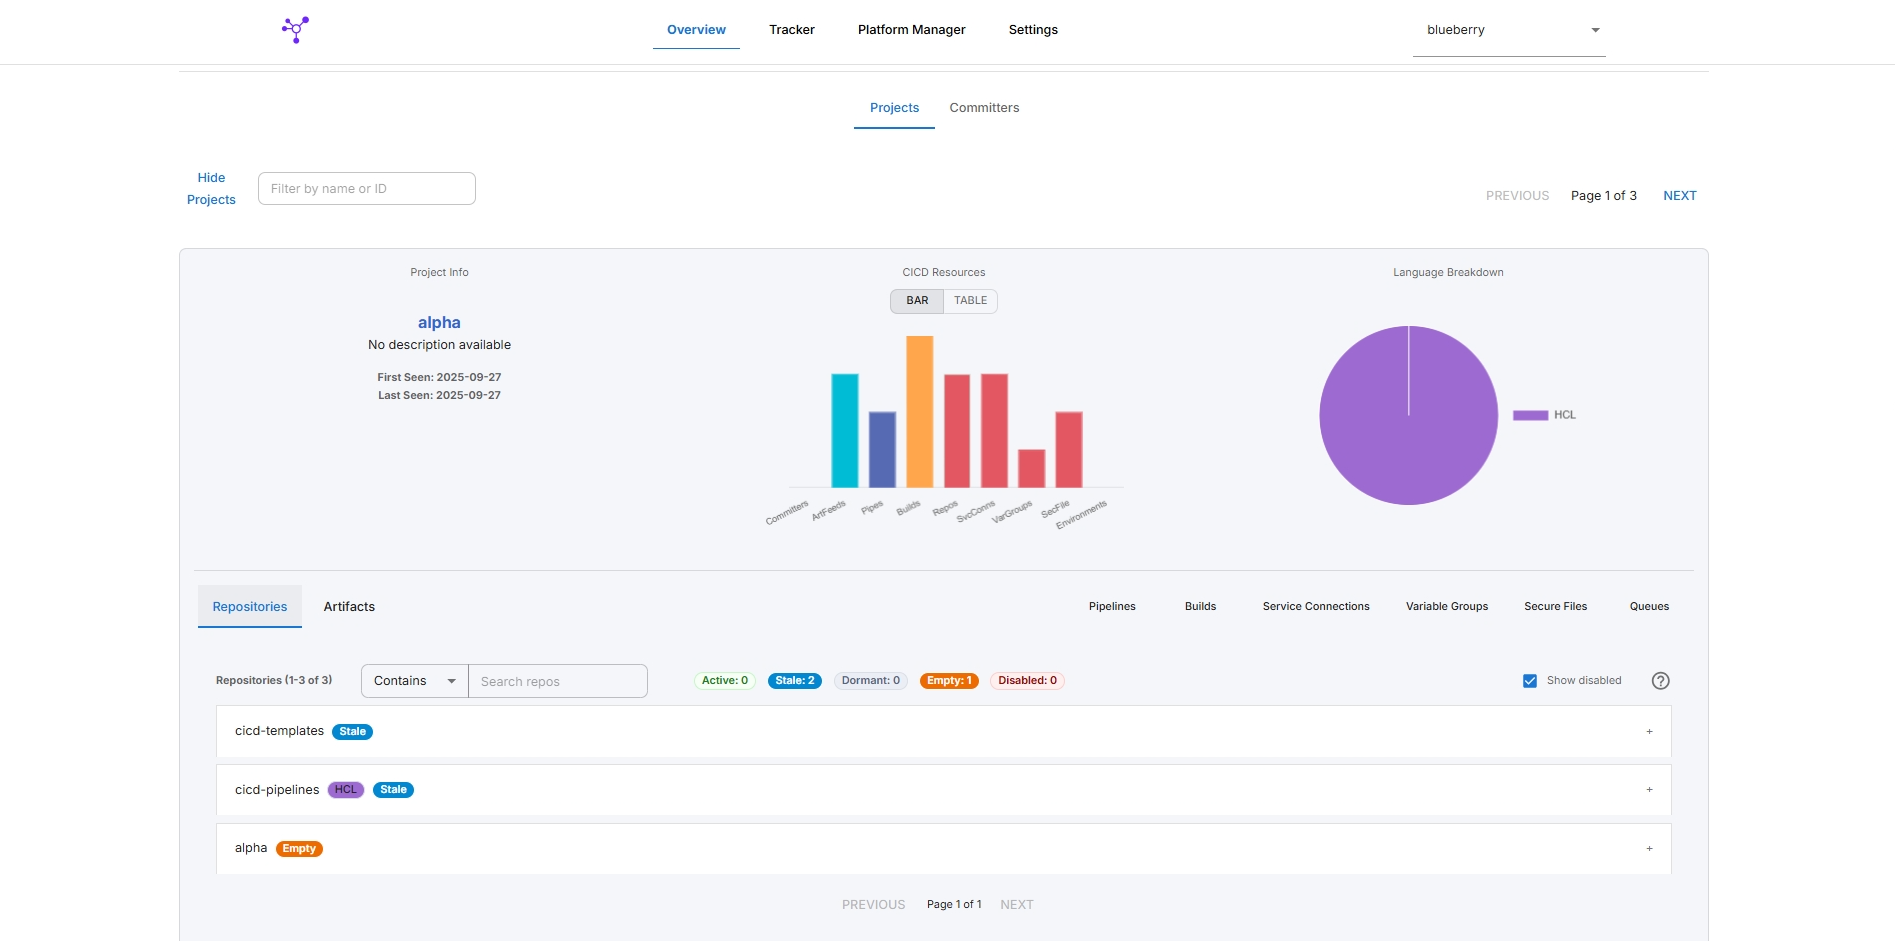
Project & Repo Stats

Commiter Stats
Key Features:
- View overall project activity: Language & project-level stats, commits and committers.
- Track commiters, contribution levels and pusher to committer identities.
- Spot active, stale, dormant and disabled repos.
Benefits:
- Quickly understand the health and activity of your projects.
- Make informed decisions about team management and resource allocation.
What's next?
CI/CD Resource onboarding is a crucial step. For each discovered resource, you should be able to understand and verify the level of access that resource has - knowing that this can change with time and become out of date.
To constantly have an up-to-date system, lock-down resource creation to only be done via an approved process.
The next step from that is enabling automatic or semi-automatic logic container assignment. A service connection, a variable group, a secure file. These are credentials that proxy us into an identity with some level of permissions into a target.
Note: Allocating the right logic container and continuous resource access level evaluation is a manual process today. Stay tuned for automatic allocation and evaluation.